Contents
- Start with the complete boundary
- Prepare the shapes and introduce the task
- Trace, record and check each side once
- Model a rectangle and an L-shaped boundary
- Use pupil responses to locate the next teaching step
- Progress from labels to measurement and missing lengths
- Copy-ready practice and explained answers
- Finish with an exit check that changes your planning
Start with the complete boundary
Begin with a journey around a shape, not a formula. Ask pupils to trace its complete boundary, mark where they start and record each side once. Then move from labelled side lengths to ruler measurement and a missing-length problem.
Perimeter is the distance around the boundary of a two-dimensional shape. It is measured in units of length and can be calculated by adding the lengths of all its sides. Multiplicative contexts: area and perimeter 1 | NCETM
Use this teaching focus: “I can follow the whole boundary, record every side once and give the total length in centimetres.” Keep boundary tracking, measurement and calculation visible as separate parts of the task.
Prepare the shapes and introduce the task
Gather centimetre rulers, pencils, coloured pencils or highlighters, plain paper, squared paper and rectangle and L-shaped cards. Prepare a recording strip with three headings: side, length in cm, checked. Give each pupil access to a shape they can trace directly.
Prepare these teaching drawings:
Rectangle A: 6 cm across and 3 cm down, with all four sides labelled.
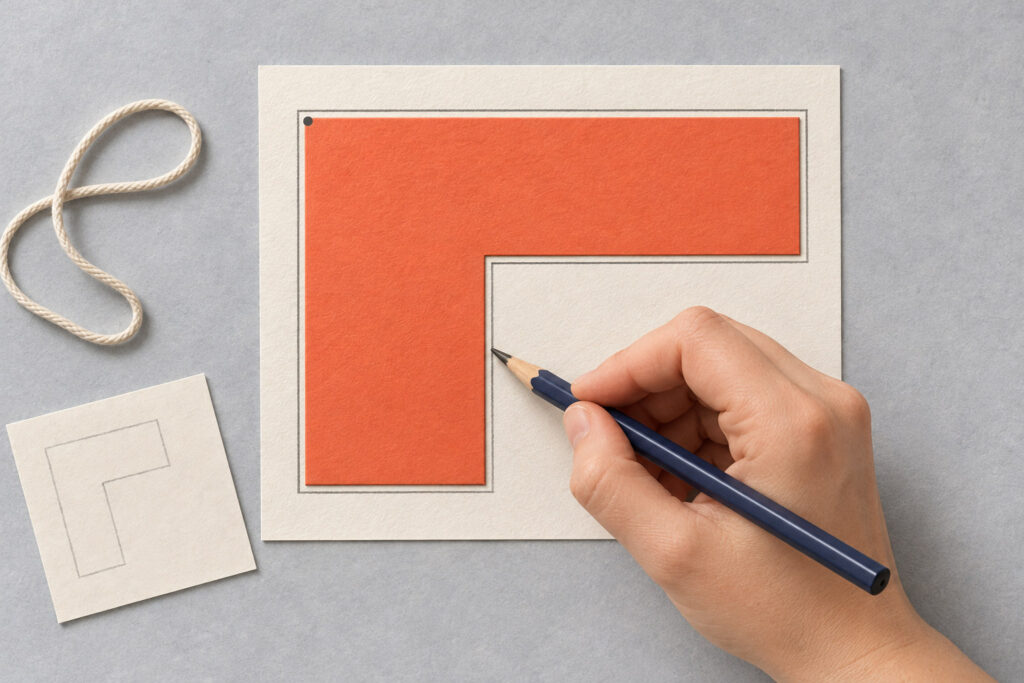
L-shape B: from the top-left corner, draw right 6 cm, down 2 cm, left 2 cm, down 3 cm, left 4 cm and up 5 cm to close the shape. Every turn is a right angle. Label the vertices A–F in that order and place each length beside its own edge.
Measurement rectangle C: draw an unlabelled rectangle exactly 5 cm by 2 cm.
Also prepare an unlabelled 4 cm line for the exit check.
Labelled calculation diagrams need not be drawn to scale: tell pupils to use their stated lengths. Measurement rectangle C and the exit-check line must be actual size. Check them with a ruler after printing or copying, and do not use a resized screen image as a measurement task.
Display Rectangle A and ask: “If a pencil travelled around the edge and returned to its starting point, where would it go?” Invite a pupil to demonstrate before asking for any arithmetic. Repeat with L-shape B: “Does our route go into this corner, or jump across it?”
Trace, record and check each side once
Teach this repeatable routine:
1. Put a dot at one corner.
2. Choose a direction and trace along the boundary to the next corner.
3. Record that side’s length, including cm, on the next line of the strip.
4. Put a small tick beside the recorded side on the drawing.
5. Continue around every corner, including the inward corner of the L-shape.
6. Stop when you return to the starting dot. Check that each side has one record, then add the lengths.
Ask a partner to point to each edge while the recorder reads the matching entry. Use prompts such as: “Which edge does this number describe?”, “Where will you turn next?” and “How will you know when to stop?” If the total is wrong, inspect the route and list before repeating the addition.
If a pupil counts centimetre intervals around a shape on squared paper, ask them to show how they tracked the boundary and counted each interval once. Accept a complete, accurate count; then invite them to connect their count to the written side lengths.
Model a rectangle and an L-shaped boundary
The classroom examples and pupil responses below are hypothetical. Rectangle A: start at the top-left corner and travel clockwise.
Top: 6 cm
Right: 3 cm
Bottom: 6 cm
Left: 3 cm
Perimeter = 6 + 3 + 6 + 3 = 18 cm.
Point to each side as you read its number. Then ask: “Where are the two 6 cm sides? Where are the two 3 cm sides?” Compare the full sum with 2 × 6 + 2 × 3 = 18 cm, keeping both pairs of sides visible.
L-shape B: begin at A, the top-left corner, and follow the prepared route.
AB: 6 cm right
BC: 2 cm down
CD: 2 cm left
DE: 3 cm down
EF: 4 cm left
FA: 5 cm up
Perimeter = 6 + 2 + 2 + 3 + 4 + 5 = 22 cm.
Check the addition by grouping: (6 + 4) + (2 + 3 + 5) + 2 = 10 + 10 + 2 = 22 cm.
Keep the inward edges CD and DE visible. Ask: “Would a finger following the edge travel along these sections?” Have pupils trace them rather than drawing a shortcut across the notch. Finish by matching every term in the sum to its edge.
Use pupil responses to locate the next teaching step
Omitted side: a pupil writes 6 + 2 + 2 + 3 + 4 = 17 cm for L-shape B.
Ask: “Point to the edge for each number. Have you returned to A? Which edge has no entry?”
Next step: have the pupil add FA = 5 cm to the record, retrace the complete boundary and recalculate 22 cm.
Double-counting: a pupil writes 6 + 2 + 2 + 3 + 4 + 5 + 6 = 28 cm.
Ask: “At which number did you first arrive back at the starting dot? Which edge does the final 6 describe?”
Next step: pair each recorded number with one edge. Remove the repeated entry and ask the pupil to explain the stopping point.
Length plus width only: a pupil writes 6 + 3 = 9 cm for Rectangle A.
Ask: “Show me the part of the boundary covered by those two numbers. Where does your route end? What remains before you reach the starting dot?”
Next step: record the remaining 6 cm and 3 cm sides. Compare 9 cm for that partial route with 18 cm for the complete boundary.
A correct answer with unclear working: a pupil writes only 22 cm for L-shape B.
Ask: “Show how you included every edge.”
Next step: accept a valid explanation, whether it uses a running total, grouped addition or counted centimetre intervals. Do not require one calculation layout if the pupil can account for the whole boundary accurately.
Progress from labels to measurement and missing lengths
Move to ruler measurement using rectangle C. Model placing the ruler’s zero mark at one endpoint, aligning its scale with the side and reading the other endpoint. Ask pupils to measure and record each side before calculating. If partners disagree, have them compare ruler placement and endpoints rather than average their readings.
For the prepared 5 cm by 2 cm rectangle, the side record is 5 cm, 2 cm, 5 cm, 2 cm, giving 14 cm. Ask: “If your answer differs, is the difference in a measurement, the boundary record or the addition?” Once pupils have measured all four sides, invite them to explain how they could check the perimeter by measuring only two adjacent sides.
Next, show another copy of L-shape B with CD unlabelled. Keep AB = 6 cm and EF = 4 cm visible. Ask: “The full top spans 6 cm. The lower horizontal section spans 4 cm. What horizontal distance remains?” Mark the matching horizontal spans without adding a line to the boundary route.
The missing CD length is 6 − 4 = 2 cm. Restore it to the side record, then calculate 6 + 2 + 2 + 3 + 4 + 5 = 22 cm. Check the other direction too: the two downward lengths, 2 cm and 3 cm, together match the full 5 cm height.
Offer premeasured, fully labelled cards when you want to focus on boundary tracking rather than ruler use. Offer a highlighted boundary and starting dot when the route needs attention; leave pupils to record the sides themselves. For an optional extension, hide both CD and DE and ask pupils to justify each missing length before finding the perimeter.
Copy-ready practice and explained answers
Give pupils Rectangle A, a fully labelled copy of L-shape B, measurement rectangle C and a second copy of B with only DE unlabelled. Use these questions as the pupil sheet.
1. Rectangle A has sides of 6 cm, 3 cm, 6 cm and 3 cm. Mark a starting point. Write a calculation for its complete perimeter.
2. Trace L-shape B. Starting at A, write each side length in order. Find the perimeter and show how you checked that no side was missed or repeated.
3. Measure every side of rectangle C in centimetres. Record your measurements and calculate its perimeter.
4. On the second copy of L-shape B, DE is missing. The full left-hand height FA is 5 cm and BC is 2 cm. Find DE. Explain your reasoning, then calculate the perimeter.
Answer guide
1. 18 cm: 6 + 3 + 6 + 3 includes all four sides once. Accept an equivalent calculation that accounts for both pairs.
2. 22 cm: the ordered list is 6, 2, 2, 3, 4, 5 cm. A starting dot and one tick per edge provide a boundary check.
3. 14 cm: the intended measurements are 5, 2, 5, 2 cm. If a pupil records different lengths, check the physical rectangle and ruler placement before judging their perimeter method.
4. DE = 3 cm because 5 − 2 = 3. The two downward sections together match the full height. The perimeter is 6 + 2 + 2 + 3 + 4 + 5 = 22 cm.
Finish with an exit check that changes your planning
Prepare a rectangle labelled 5 cm across and 3 cm down, with both pairs of side lengths shown, alongside the actual-size 4 cm line. Ask pupils to complete these independently, recording any prompt you give.
Exit check
1. Mark a starting dot on the labelled rectangle. Trace its complete boundary and write its perimeter calculation.
2. Measure the separate line in centimetres. Leave a small mark to show where you placed zero.
3. A different rectangle has a perimeter of 20 cm. Its two long sides are each 6 cm. What is the length of each short side? Show your reasoning.
Exit-check answers
1. 16 cm: 5 + 3 + 5 + 3. The trace should return to its starting point without repeating an edge.
2. 4 cm, with the ruler’s zero aligned to an endpoint.
3. 4 cm: the long sides use 12 cm of the perimeter; 20 − 12 = 8 cm remains for two equal short sides, so each is 4 cm.
Choose the next step from the work, not just the total score:
If an edge is omitted or repeated, revisit tracing with a starting dot and one record per edge.
If the route is complete but measurements differ, practise zero alignment and endpoint reading on separate lines, then return to a shape.
If the side record is complete but addition is wrong, keep the shape and practise checking the sum in groups.
If boundary tracking, measurement and calculation are secure, extend to missing lengths and ask for a justification.
If a pupil succeeds only after a prompt, record the prompt and try a similar item without it next time.
The Education Endowment Foundation’s guidance on mathematics in Key Stages 2 and 3 recommends using specific information about pupils’ strengths and weaknesses to plan future lessons and targeted support, including information from informal observation and mathematical discussion. Improving Mathematics in Key Stages 2 and 3: Email Course 1 | Education Endowment Foundation
Keep a short record under four headings: boundary, measurement, calculation and next step. If you want a separate model for organising questions and recording what pupils demonstrate, Formative assessment examples: a whole-number place-value check provides a copyable question set and recording sheet in a different mathematics context. Adapt the recording approach while keeping the perimeter criteria above.