Contents
- The lesson focus
- Prepare the strips and units
- Model starting, repeating and recording
- Measure and check in pairs
- Copy-ready pupil recording sheet
- Copy-ready error-analysis cards
- Compare the same length using two unit sizes
- Close with a check that selects the next teaching step
- Transfer the task to everyday objects
The lesson focus
Plan the lesson around one task: measure a strip from one endpoint to the other using repeated, equal-sized units, then record both the count and the unit. Keep the units movable so pupils can show, check and repair their measurements.
Non-standard length measurement uses one object repeatedly, or duplicates of the same-sized object, placed end to end. Accurate placement means aligning the first unit with the starting edge and leaving neither gaps nor overlaps between units. The Mathematics of Measurement — Stanford DREME Measurement at a Glance — Stanford DREME For Teachers
Use this sequence: teacher modelling, paired measurement, a comparison using two unit sizes, independent practice and a closing check. Listen for explanations about placement as well as the final count.
Prepare the strips and units
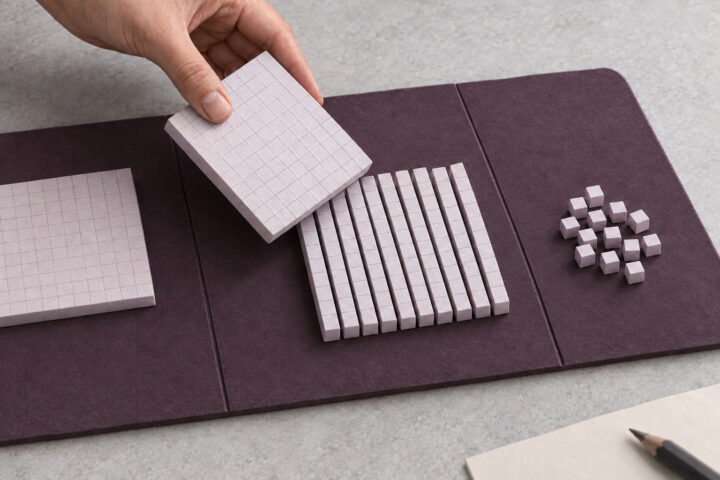
Choose identical cubes or equal-length paper pieces as the small unit. For paper units, cut them from one template and use the same edge to measure each time. For cubes, use the same type throughout and check that they connect or sit flush. Provide enough units to cover the longest strip, plus a few spare.
Make one set of strips for each pair. Lay four small units end to end, then cut a card strip to match their combined length; label it A. Repeat with six units for B and eight units for C. Keep these labels on the strips, but keep the lengths on your teacher key. Check each strip against a fresh row of units before the lesson.
For the comparison task, make a second set of paper units, each exactly twice the length of the small unit. Use two small units end to end as the cutting template. Keep the sets separate until pupils are ready to measure the same strip twice.
Stanford DREME’s Measurement Assessment Protocol recommends choosing an object with a whole-number length in connecting cubes and observing whether the child aligns the cubes with a common starting point and describes the length using the number of cubes. Measurement Assessment Protocol — Stanford DREME
Use the prepared strips for this lesson’s exact answers. An everyday object may end partway through a unit; if you introduce one, accept a description of the leftover length rather than forcing a whole-number answer. The Mathematics of Measurement — Stanford DREME
The classroom examples and pupil responses below are hypothetical. Teacher key:
A = 4 small units
B = 6 small units
C = 8 small units
C = 4 large units, when each large unit is twice the small unit’s length.
Model starting, repeating and recording
Place strip B horizontally where everyone can see both endpoints. Put one small unit beside it and say: “I am measuring the length along this edge. This is my starting point. The beginning of my first unit goes exactly here.” Point to the matching ends before adding anything else.
Add the next unit and say: “This unit starts where the last one ends. They touch, but neither sits on top of the other.” Continue to the far endpoint. Sweep a finger along the row to check every join, then point to the strip’s endpoint and the end of the final unit.
Count each unit once: “One, two, three, four, five, six. The strip is 6 small paper units long.” Record: “B = 6 small paper units.” If using cubes, say and record “6 cubes” instead. Ask: “What does the six count? What tells us we have measured the whole strip?”
For a second worked example, measure A with one movable unit. Mark the end of the first placement, move the unit so its start meets that mark, and repeat without changing its orientation. Say: “I have one paper piece, but I am counting how many unit lengths cover the strip.” After four placements, record “A = 4 small paper units.”
Use a row of duplicate units first if moving a single unit makes it difficult for pupils to preserve the previous endpoint. Keep the single-unit demonstration as an additional way to show unit iteration, not an extra requirement for everyone.
Measure and check in pairs
Give each pair strips A, B and C and one set of small units. One pupil measures while the other checks; then swap roles for the next strip. Ask the checker to inspect the arrangement before either pupil records the answer.
Checker’s questions:
Are all the units the same length?
Does the first unit start at the strip’s endpoint?
Do the units touch without gaps or overlaps?
Does the last unit end at the other endpoint?
Have we counted each unit once and named the unit?
For support, mark the starting endpoint with a removable dot or pre-position the first unit. Leave the remaining units loose for the pupil to place. If counting is the sticking point, invite the pupil to touch each unit while counting; do not treat a valid counting strategy as a measurement error.
Ask pairs to compare the strips using their measurements, then place the strips against a common starting line to check. Prompt: “Which is longest? How can the measurements and the aligned strips both show that?”
Copy-ready pupil recording sheet
Copy the following sheet for pupils. During paired work, use it as a shared record; for independent practice, give pupils a fresh copy and ask them to measure again without a partner checking first.
Length measurement record
Name: ____________________
My unit is: ____________________
Strip A
Count: ______
The strip is ______ ____________________ long.
Strip B
Count: ______
The strip is ______ ____________________ long.
Strip C
Count: ______
The strip is ______ ____________________ long.
Shortest strip: ______
Longest strip: ______
Choose one strip. Explain how you checked your measurement:
________________________________________________
________________________________________________
Answer guide: A is 4 small units long; B is 6 small units long; C is 8 small units long. A is shortest and C is longest. An explanation should identify a relevant check, such as matching the starting endpoint, checking every join or matching the final endpoint. Ask pupils to demonstrate if their written explanation is unclear.
Copy-ready error-analysis cards
Use these cards with strip B and loose units. Read each card aloud or copy it for pairs. Have pupils build the described arrangement, discuss it, then repair it. Judge the method as well as the stated number.
Card 1: A gap
A pupil puts five small units beside strip B. The first and last ends match the strip’s endpoints, but there is an empty space as long as one small unit between two pieces.
The pupil says, “B is 5 small units long.”
What has not been measured?
How would you repair the arrangement?
Card 2: Overlapping units
A pupil makes a row beside strip B, but some paper units lie partly on top of others. The pupil counts all the pieces without checking the joins.
Can that count be accepted as the length?
Show how to check and repair the row.
Card 3: Mixed-size units
A pupil covers strip B exactly with two large units and two small units. Each large unit is twice as long as a small unit.
The pupil writes, “B is 4 units long.”
What does this record leave unclear?
How could you measure B using only one unit size?
Card 4: The wrong starting point
A pupil starts one small-unit length after the beginning of strip B. Five small units then reach the far endpoint.
The pupil says, “B is 5 small units long.”
Which part of B has been left out?
Where should the first unit begin?
Answer guide:
Card 1: The gap is part of the strip but has not been counted. Fill it with another small unit, check the joins and count 6 small units.
Card 2: The overlapping pieces do not form an end-to-end row. Separate and reposition them, then count the units needed to cover B: 6 small units.
Card 3: Four counts pieces of different lengths, not repetitions of one equal-sized unit. The arrangement can be described as two large units plus two small units, but remeasure with one size: 6 small units or 3 large units.
Card 4: The first small-unit length of B has been omitted. Start at B’s endpoint and measure the whole strip: 6 small units.
For an extension, ask pupils to construct an incorrect measurement, explain exactly why it is incorrect and repair it. Require the explanation to refer to the units or endpoints, rather than simply saying that the answer is wrong.
Compare the same length using two unit sizes
Return to strip C. Measure it first with the small units, remove them, and measure it again with the large units. Keep each measurement within one unit size. Place the two completed rows beside C if pupils need to inspect them together.
Comparison record
C is ______ small units long.
C is ______ large units long.
Did strip C change length?
Why are the counts different?
Does the bigger number mean that the strip became longer?
What information must we include when we report each count?
Worked answer: C is 8 small units long and 4 large units long. The strip has not changed. Each large unit covers the same length as two small units, so four large units cover what eight small units cover. The count must be interpreted with its unit, not on its own.
If a pupil says, “Eight means this one is longer,” place one large unit beside two small units. Ask: “What length do these cover? Now show where both rows begin and end.” Have the pupil compare the covered lengths before revising the explanation.
Close with a check that selects the next teaching step
After independent recording-sheet practice, use this short closing check. Keep units available, but ask pupils to work without partner help. Note any pre-positioned unit or other support you provide.
Closing check
1. Measure strip A. Write its length with the unit. Show how you checked both endpoints.
2. A row reaches both ends of strip B, but it contains a gap. Is matching the endpoints enough? Explain or show a repair.
3. Strip C measures 8 small units or 4 large units. Has its length changed? Explain using the units.
Answer guide:
1. A is 4 small units long, with equal-sized units touching end to end and aligned to both endpoints.
2. No. The row also needs equal-sized units with no gaps or overlaps. Repair the row and remeasure B as 6 small units.
3. No. Each large unit covers two small-unit lengths, so the different counts describe the same strip.
Choose the next move from what the pupil shows:
“Four,” with correct placement but no unit in the record: ask “Four what?” and have the pupil complete the measurement sentence.
An incorrect count with a correctly placed row: invite touching and recounting each unit once; do not reteach alignment unless it is also insecure.
A row that starts inside the strip: pre-position the first unit at the endpoint, then ask the pupil to finish and explain what was previously left out.
“Yes, the ends match,” despite a gap: ask the pupil to trace the uncovered section, fill it and recount.
“The strip is longer because eight is bigger”: compare one large unit with two small units, then rebuild both rows against C.
Accurate placement, recording and unit-size explanation: move to the explain-and-repair extension using a single movable unit.
Transfer the task to everyday objects
For a later transfer task, invite pupils to choose toys or classroom objects and decide which lengths to compare. Build Kids’ Math Skills Through Daily Routines includes an activity measuring toys or furniture and comparing which is tallest or longest; use that idea to move from prepared strips to a purposeful object comparison.